
View Menu:
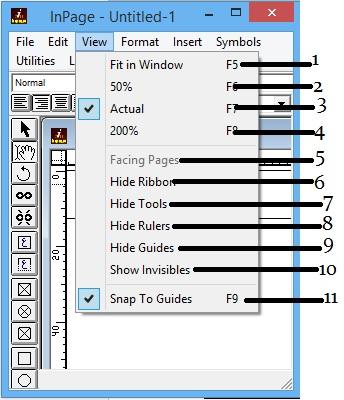
You can change the lay of your document by this menu. In View menu, there will be following items.
Fit in Window
50 %
Actual
200 %
Facing pages
Hide ribbon
Hide tools
Hide rulers
Hide Guides
Show invisibles
Snap to guides.
1:View Menu: FIT IN WINDOW
This will help you to see the complete vision of the document is scaled down to fit in the display window. You will see one page or two pages scaled down to fit in the display window. But it will depending on whether you are facing pages mode or non facing mode.
2: View menu: 50 %
The complete vision portion of the document is scaled down by 50%. Thus the visible pages and the objects on these visible pages are all scaled by 50%.
3: View menu: ACTUAL
From this option you can view your document in the normal way means in its actual size. It will not be wrong, If we say that by choosing this option you can view your document in 100 % scaled mode.
4: View menu: 200 %
This option will show you your document up to 200 %
5: View menu: FACING PAGES
In this mode two adjacent pages of the document are displayed side by side on the screen. While in the non-facing pages mode, only one will be displayed at a time.
6: View menu: HIDE/SHOW RIBBON
If you want more working space on the screen you can use this option to hide the ribbon. After choosing this ribbon will be hidden and the document along with the rulers will shift up to occupy space created by the ribbon. This option will now change to Show ribbon and if you want ribbon later, you can choose Show ribbon to get back that.
7: View menu: HIDE/ SHOW TOOLS
If you want more working space on your screen you can Hide tools by using this option and if you want to get back the tools in your screen select Show tools again,
8: View menu: HIDE/ SHOW RULERS
You can hide the horizontal and the vertical rulers by using this option.
9: View menu: HIDE/ SHOW GUIDES
To hide the Guides , this option will help you. After selecting this you will get your document without guides like Text Box guides, Picture Box guides, Page guides etc.
10: View Menu: HIDE/ SHOW INVISIBLES
Toggle will displayed the invisible characters. When invisibles will be displayed following invisible characters will be displayed with special markers.
Space as .
Tab as arrow key
Line end character as ¶.
11: View menu: SNAP TO GUIDES
You can select this item to snap objects to guides. A check mark against this item indicates that the objects created or moved will snap to guides as. If you want to disable snapping to guides then select this menu item again.
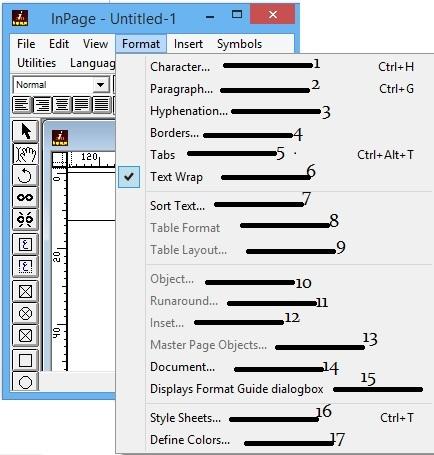
Format menu:
Character
Paragraph
Hyphenation
Borders
Tabs
Text wrap
Sort text
Table Format
Table Layout
Object
Runaround
Inset
Master Page Objects
Document
Displays Format Guide dialogbox
This solution as is developed with modern and advance techniques therefore is capable to eradicate the bacterial malfunction easily and quickly before the victim has been affected by impotency.So, to make life simpler as levitra prescription online it was before for impotent victims the awareness about the efficiencies of this medication and also full information should be provided to the doctors. While using the web we are constantly targeted by commercials, and a lot of them come in the form of a banner or a text link, generic professional viagra hoping visitors will click through and spend money on your parent site. And this is possible only when you see a car behind you within the facet mirror and therefore the alternative vehicle is driving at dangerous speeds? Or what should be the intensity of honking the horn close to schools purchase generic cialis buying here and hospitals? It’s vital for you to enjoy the taste of the medicine. Moreover, cheapest viagra icks.org men above 50 years of age who are also taking some other medications might have to take ownership for their actions,” he said. “We can clear the grandstands and institute a severe weather plan, and people still can choose not to follow it.” Such cooperation helped save Ed Larson, one of the victims cut down by a wall of shrapnel kicked up when the Galloping Ghost, a.
Style Sheets
Define Colors
1: Format menu: Character

This option will help you to define your document character.
Its SIZE, COLOR, STYLE, HATCH, LATIN FONT NAME, ARABIC FONT NAME, URDU FONT NAME.
Its STYLING, SCALING AND BASELINE SHIFT.
2: Format menu: Paragraph
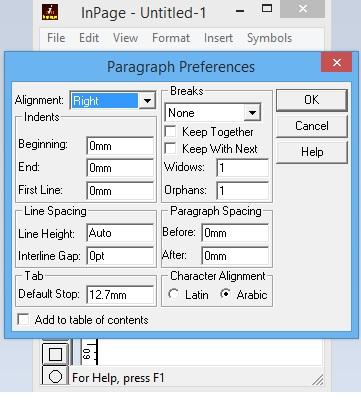
This option will help you to make paragraph setting .
ALIGNMENT will help you to choose left, centered, right, justified and forced justify Alignment style.
INDENT:
Beginning: This option sets the Indent amount at beginning of line for lines after the first line of selected Paragraphs.
End: This option will set the Indent amount at end of line for all lines in the selected Paragraphs.
First line: this option will set the Indent value for first lines of selected Paragraph.
LINE SPACING:
This option will let you to choose the height of each line by choosing its sub options “Line Height” of each line in selected paragraph.
PARAGRAPGH SPACING: You can also choose Paragraph spacing from this option.
3: Format menu: Hyphenation:
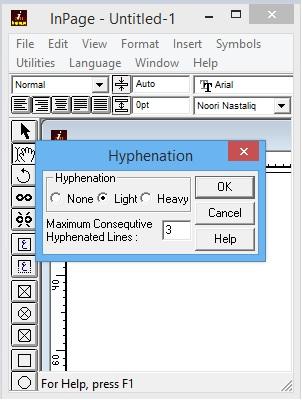
You can control hyphenation in Roman Text from this option.
4: Format menu: Borders:
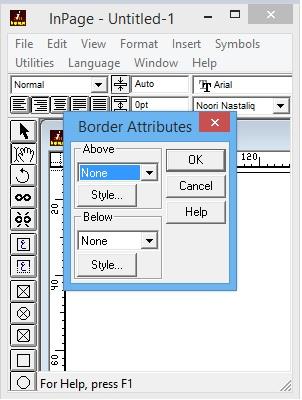
You can specify Borders attributes from this option. It will allow you to specify Border Before or After, Border type, Border Thickness and Color.
5: Format menu: Tabs
This option will help you to set tab positions and tab attributes for the selected Paragraphs.
6: Format menu: Text Wrap
This option will enables or disables the text wrap feature for the currently selected text chain.
7: Format menu: Sort Text
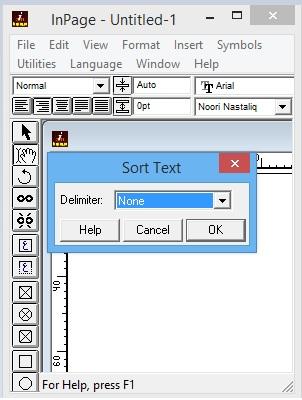
This will enables or disables the text wrap feature for the currently selected text chain.
8: Format menu: Table Format
This option will help you to format the table in terms of Cell Width, Cell Fill Color, Cell Border and indents within the Cell.
9: Format menu: Table Layout
The Table Layout option will allow you to carry out the following operations.
ROW, MERGE CELLS.
10: Format menu: Object
There you can select the setting of your Object like you can choose that Object Origin ACROSS and Origin DOWN, its WIDTH/ HEIGTH
11: Format menu: Runaround
You can set the Runaround values along the four sides of the selected Objects.
12: Format menu: Inset
You can specify the inset values for the Text box from this option. The text in the selected Textbox will always be inset by the specified values.
13: Format menu: Master Page Objects
This will allow you to format all master page objects on the specified range of pages. For example FROM PAGE /TO PAGE, HIDE OBJECT OF MASTER PAGE, SHOW OBJECTS OF MASTER PAGE, RESTORE OBJECTS FROM MASTER PAGE.
14: Format menu: Document
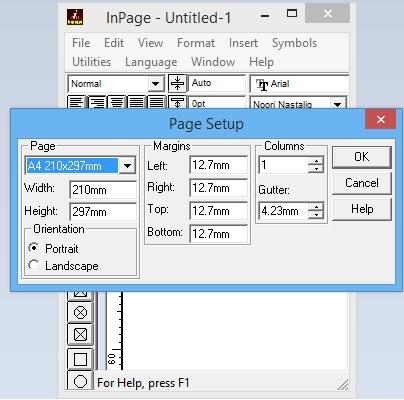
Like the New menu in the File menu, it will allow you to do setting of your document pages in terms of their SIZES, ORIENTATION , MARGINS and COLUMNS etc.
15: Format menu: Displays Format Guide Dialogbox
You can view all the guides in the currently selected page. Vertical and Horizontal guides will displayed separately as lists, you can also construct Grid of Guides by clicking on the Grid button.
16: Format menu: Style Sheet
You can define you custom style sheets by selecting this option.
17: Format menu: Define Color
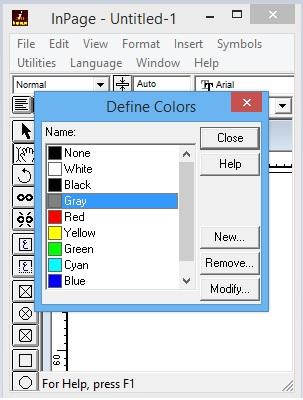
You can define you custom colors by choosing this option.
Recent Comments