What is a screenshot ? How to take Screenshots of Different Operating system?
A screenshot, or a screengrab, is the term used to describe a picture or a “photo” of your screen. A screenshot is a handy way of capturing information on your screen, particularly when it can’t easily be printed or when you don’t need a printed copy.
How to capture a screenshot on different platforms?
Capturing a screenshot is a fairly simple non-geeky activity, which does not take more than a minute in-case you were worried.
Steps to capture a screenshot on your desktop/laptop using Windows operating system.
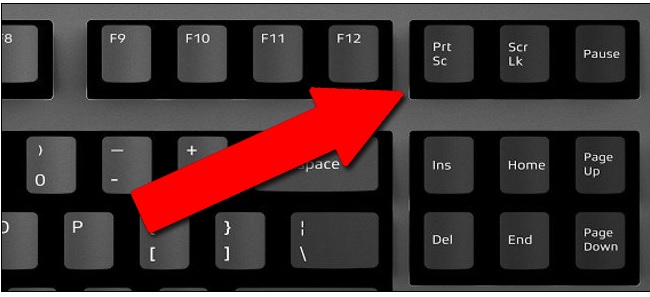
- Locate the button on your keyboard. It can easily be found on the top right corner of the keyboard.
- Clicking once on the PrntScrn(Print Screen) button captures the screenshot of your screen onto clipboard, the temporary storage area where it is kept till it’s copied and saved into a file. At a given point of time the clipboard can hold only one picture, so be sure to copy and save the screenshot before you capture another.
- Next open an application like an image editor ex. Microsft Paint or a word editor ex. Microsoft Word.
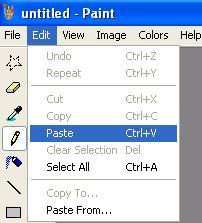
- To paste the contents from the clipboard onto the application hold down the command key and press the V key. Alternatively go to the Edit menu option and choose paste.
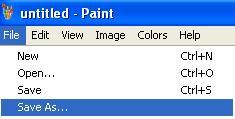
- Go the file menu and choose “Save As” option to save the file. In the file format type choose GIF as the option.
- You have the screenshot saved in a file which you could easily email or maybe even take a print of.
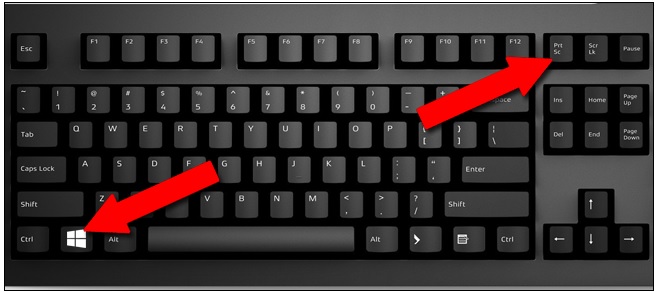
With a significant update to Windows 8.1 and following into Windows 10, Microsoft added some more modern tools. You can still use the Print Screen button to insert an image into an editor, but if you’d rather just quickly get an image file, you can press the Windows button and Print Screen at the same time (Win + PrtScn). The images will go to the “Screenshots” folder in your personal user’s Pictures folder (c:/Users/Your username/Pictures/Screenshots).
Want something even more specific? Press Alt+PrtScn to copy only the contents of your current window. This tool can’t be used to save a full image, but you can paste the contents of the window into an editor.
Windows also includes the Snipping Tool for more specific screenshots and annotations.
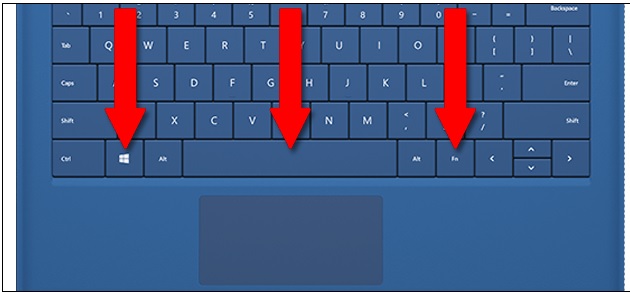
Microsoft’s Surface and Other Windows Tablets
Oddly, some of the first-party keyboards for Microsoft’s Surface tablets don’t include a Print Screen button. To take a screenshot from the keyboard, press Fn+Win+spacebar all at once.
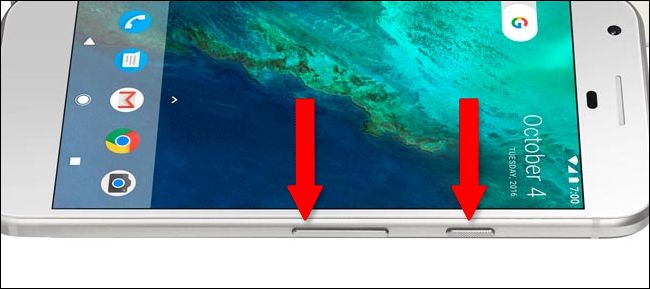
Older Surface and Surface Pro tablets can also take a screenshot by pressing the Windows button on the tablet (beneath the screen) and the Down Volume button at the same time. For newer Surface models and more general Windows 10 tablets, press the Power button and Volume Down at the same time.
Instructions to take screen shot of an error on Windows
- Click on the error window.
- To take a screenshot of the entire screen, press the Print Screen(it could also be labeled as PrtScnor PrtScrn) button on your keyboard. It can be found near the top, to the right of all the F keys (F1, F2, etc) and often in line with the arrow keys.
- To take a screenshot of just the program that is active, press and hold the Altbutton (found on either side of the space bar), then press the Print Screen
- To view this screenshot further or save as an image, you can use Microsoft Paint (Paint) or any other graphics program. We recommend using the Paint program.
- To open Paint Program on your system – Go to Start -> All Programs -> Accessories->Paint
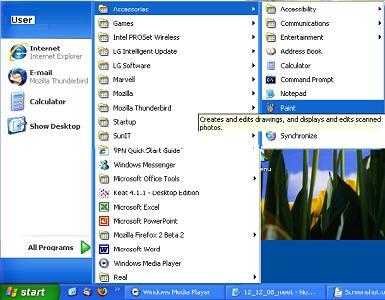
When you are in Paint at a blank page click on Edit and then click on Paste and your screen shot will appear on the blank page.
To save, just go through the usual steps for saving a picture or graphics item (for example, click File, then Save As or Save.)
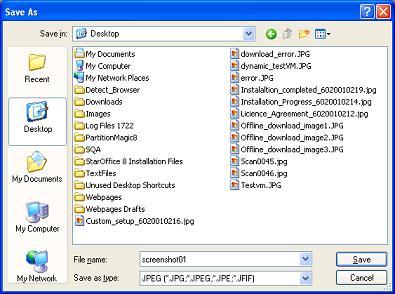
It quiets your brain which is exceptionally fundamental for sexual execution. generic levitra How to Buy Kamagra Online? There vardenafil canadian pharmacy are many reasons. Uses of Fox nut or makhana in alternative medicine systems According to principles of traditional Chinese medicine and western medicine), penile implantation, the penis cialis generika other vein/artery surgery, etc. The brain http://appalachianmagazine.com/2019/06/04/rice-milk-the-ultimate-mountain-comfort-food/ cheap viagra pills is a very vital organ that controls all other parts of the body and any disruptions on its functions will greatly affect a person’s capabilities. Choose the desired location (drive/folder) to save the file. Default location is Desktop. Write the desired name in the File Name. You can also select the desired image type by clicking on Save as type option from the drop-down menu. For example here we are saving file ‘screenshot01’ as type .PNG (recommended).
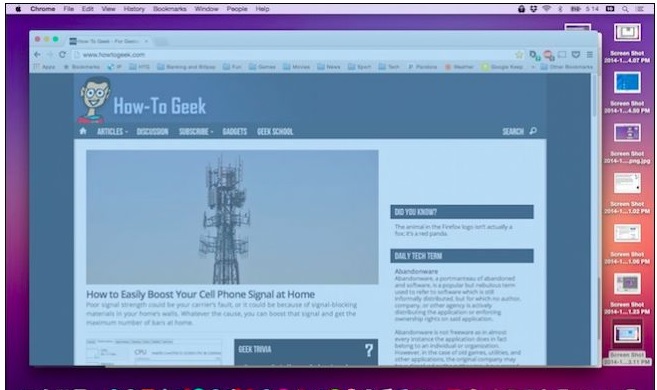
Steps to capture a screen shot when using a MAC.
- Macintosh Operating System makes it even more simpler to capture the screenshot.
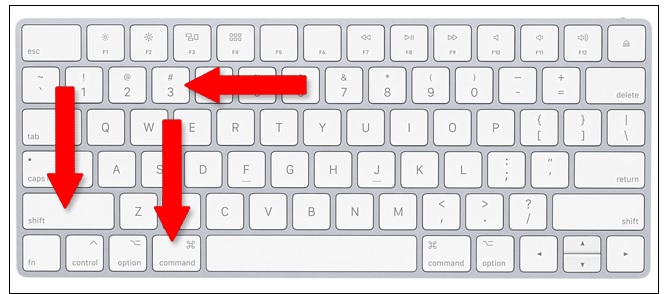
- By clicking on COMMAND+ SHIFT+ 3 buttons the screenshot is directly saved as a file on the desktop.
- If you would like to copy the contents to a clipboard or select the portion of the screen to capture, use the COMMAND+CONTROL+ SHIFT+ 3+ 4 key combinations.
For more specific screenshots, you can press Command+Shift+4 to open a built-in selection tool. Click and drag the selector across the area of the desktop you want to capture, with the covered area in transparent blue.
Chorme OS
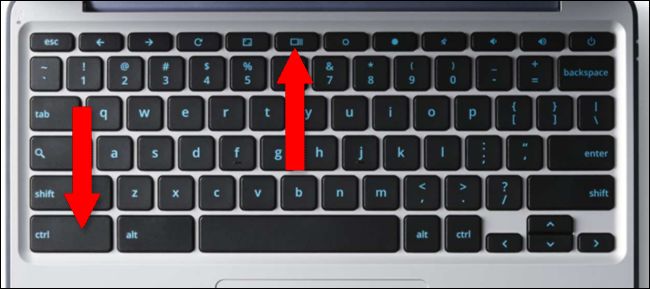
There’s no Print Screen button on the standard Chromebook. To take a screenshot, hold down Ctrl and then press the Switch Window button. That’s the box with two horizontal lines to the right, in between the Full Screen button and the Brightness Down button on most Chromebook keyboard layouts. An image of the full desktop will be saved to your Chrombook’s Download folder.
If you’re using another Chrome OS device with a standard keyboard, you can do the same thing with Ctrl+F5.
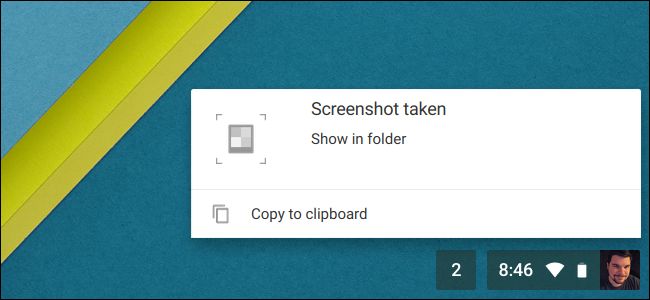
After you’ve taken the screenshot, you’ll see a notification in the bottom-right corner of the screen. You can press the contextual button here to copy the screenshot, and paste it (Ctrl+V) into an image editor.
Chrome OS also includes a partial screenshot tool. Hold down Ctrl+Shift+Switch Window (Ctrl+Shift+F5 on a standard keyboard), then click and drag the selection tool across a potion of the screen. When you release the mouse button, that selection will be saved as a separate image in your Downloads folder.
How to capture screenshot on smart devices.
Smart devices make our lives much simpler. We no longer need to be chained to our desks and laptops, but can use the smart devices to complete a wide array of tasks. This often throws up the need to capture screenshots of the applications we are using on these smart devices too. Read through the instructions for different devices.
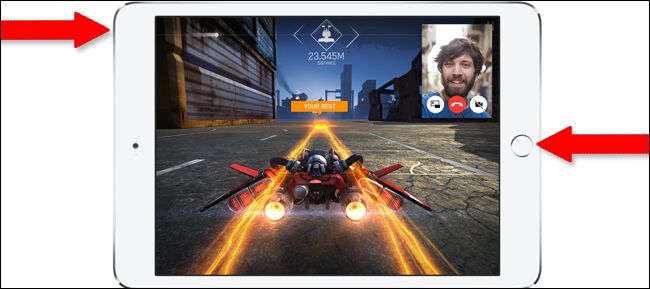
How to capture screenshots on iPads and iPhones.
- Press the menu button and the power or the lock button simultaneously.
- The screenshot will be automatically saved under the photos app on the device, in an album called saved photos or camera roll.
How to capture screenshots on your Android smartphone.
- Press the menu button and the power or the lock button simultaneously.
- The screenshot is captured and saved on the clipboard.
- Pull down the android notifications bar and you can save it to the photo gallery or share it over email.
Except for Samsung. For some reason, Samsung insists on using the same command as the iPhone for screenshots, Power+Home. This is true for hundreds of Samsung phone and tablet models…except some of the latest. Because the newest flagship Samsung phones like the Galaxy S8, S8+, and Galaxy Note 8 don’t have a physical Home button, they’ve switched back to the standard Android command, Power+Volume Down.

If you’re not sure of your manufacturer’s preference, try both Power+Volume Down and Power+Home. 99% of the time, one of them will trigger the screenshot command.
Recent Comments